Go straight to tips and tricks for the following Autodesk Products:
Assembly visibility settings in Inventor
Written by Tata Technologies CAD/PLM Geek on Tuesday, September 30, 2008
Tata Technologies CAD/PLM Geek
Tuesday, September 30, 2008
![]()
![]()
Labels: Assembly , component opacity , visibility
Frame Generator - Out of the Box
Written by Tata Technologies CAD/PLM Geek on Monday, September 29, 2008
Tata Technologies CAD/PLM Geek
Monday, September 29, 2008
![]()
![]()
Labels: Autodesk Inventor , Frame Generator
I've Found The Missing "LINK"
Written by Tata Technologies CAD/PLM Geek on Wednesday, September 24, 2008
Tata Technologies CAD/PLM Geek
Wednesday, September 24, 2008
![]()
![]()
Labels: Autodesk Inventor , parameters
Inventor...One More Section at a Time
Written by Tata Technologies CAD/PLM Geek on Monday, September 22, 2008
See Video Here
Hope it save you a few steps.....
John With the INCAT CAD Geeks
Tata Technologies CAD/PLM Geek
Monday, September 22, 2008
![]()
![]()
Labels: Autodesk Inventor 2009 , Sections
Autodesk Intent - Step 1 - Adopting Components
Written by Tata Technologies CAD/PLM Geek on Friday, September 19, 2008
Tata Technologies CAD/PLM Geek
Friday, September 19, 2008
![]()
![]()
Automating Detail Parts List Using Templates
Written by Tata Technologies CAD/PLM Geek on Thursday, September 18, 2008
Speaking with a customer recently I found that everytime they would create a parts list for a single detail they would go through the steps of adding a parts list then add column information an so on. Well this adds up in time especialy when you do a couple hundred details. Lets take a look at changing this process for them. In there case they want to show a detail number, material and overall domensions for there parts list. I will use a template file for getting my overall dimension easily and add some information to my template title block. Lets take a look.
Tata Technologies CAD/PLM Geek
Thursday, September 18, 2008
![]()
![]()
Labels: Autodesk Inventor , iproperties , templates , title block
One Section At A Time
Written by Tata Technologies CAD/PLM Geek on Monday, September 15, 2008
Tata Technologies CAD/PLM Geek
Monday, September 15, 2008
![]()
![]()
Labels: Assembly , Autodesk Inventor 2009 , Sections
Managing Assembly Constraints
Written by Tata Technologies CAD/PLM Geek on Thursday, September 11, 2008
As an Inventor user we must know and love working with constraints. Well love might be a bit overboard but they are nessecary in our designs to have movement and proper placement of parts within our assemblies. My video is going to cover some best practices when working with constraints and some tools we have avaiable to help understand the relationships we have built. Let's take a look
http://www.screencast.com/t/NEmrqvqFb9
Created by Dave one of the Cad Geeks
Tata Technologies CAD/PLM Geek
Thursday, September 11, 2008
![]()
![]()
Labels: Autodesk Inventor , Constraints , Design Doctor , iMap , Model View
Basic Model Tolerances when Fractions Count
Written by Tata Technologies CAD/PLM Geek on Wednesday, September 10, 2008
Tata Technologies CAD/PLM Geek
Wednesday, September 10, 2008
![]()
![]()
Labels: Autodesk Inventor , parameters , tolerances
Base Solids Editing - Part 3
Written by Tata Technologies CAD/PLM Geek on Tuesday, September 09, 2008


Hello again. In part 3 of this series concerning the editing of base solids, I would like to show an example of moving an entire set of faces on a model. This is just another way to edit a part that doesn't actually have any features to edit.
Check out this video for an example:
Watch Video Here
Contributed by Ben of the INCAT CAD Geeks
Tata Technologies CAD/PLM Geek
Tuesday, September 09, 2008
![]()
![]()
Labels: Autodesk Inventor , Base Solids Editing , Move
Do you have the Knack?
Written by Tata Technologies CAD/PLM Geek on Friday, September 05, 2008
Tata Technologies CAD/PLM Geek
Friday, September 05, 2008
![]()
![]()
Labels: Knack
Using Overlay Views with Inventor
Written by Tata Technologies CAD/PLM Geek on Thursday, September 04, 2008
When I was a designer I always had to show extended and retracted positions of any item in my design that moved. This took some time to set-up worrying about capturing the information, placing it, rotating it and of course if there was a design change just another item I had to make sure I updated. With Inventor this is no longer an issue using Overlay view in my drawing environment.

Let's take a look
http://www.screencast.com/t/s1MjWCT3j
Created by Dave one of the Cad Geeks
Tata Technologies CAD/PLM Geek
Thursday, September 04, 2008
![]()
![]()
Labels: Autodesk Inventor , dr , Overlay Views , positional reps
Super Fast Assembly Constraints
Written by Tata Technologies CAD/PLM Geek on Wednesday, September 03, 2008
When constraining components using the Alt-drag shortcut, you can change the constraint type after you start dragging the first part.
Release the Alt key and enter a shortcut key:
M or 1
Changes to a mate constraint. Press the space bar to flip to a flush constraint.
A or 2
Changes to an angle constraint. Press the space bar to flip angle direction on the selected component.
T or 3
Changes to a tangent constraint. Press the space bar to flip between an inside and outside tangent constraint.
I or 4
Changes to an insert constraint. Press the space bar to flip insert direction.
R or 5
Changes to a rotation motion constraint. Press the space bar to flip rotation direction.
S or 6
Changes to a translation (slide) constraint. Press the space bar to flip slide direction.
X or 8
Changes to a transitional constraint.
Tata Technologies CAD/PLM Geek
Wednesday, September 03, 2008
![]()
![]()
Labels: Autodesk Inventor , Constraints
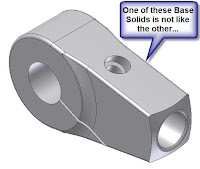
Base Solids Editing in Inventor - Stretch Trick
Written by Tata Technologies CAD/PLM Geek on Tuesday, September 02, 2008
 One of the tricks I find most people are unaware of in Inventor is the ability to edit "Base" features in Inventor. Base features are what you normally get when you import a model from another CAD system or Step file. Many people have figured out that they can sketch on faces of a Base model to create additional features, but few know they can use something as simple as the "Delete" key to remove features while in the Base Editing mode (as detailed in a previous CAD Geek post). I just wanted to show an example of utilizing a work plane and streching a base solid to a wider variation. Take a look at this video for a quick example:
Tata Technologies CAD/PLM Geek
Tuesday, September 02, 2008
![]()
![]()
Labels: Base Solids Editing , import , Inventor


 Let's take a look


